🚀 Try Zilliz Cloud, the fully managed Milvus, for free—experience 10x faster performance! Try Now>>

milvus-logo
LFAI

HomeBlogsSet Up Milvus in Google Colaboratory for Easy ML Application Building

Set Up Milvus in Google Colaboratory for Easy ML Application Building

  • Engineering
December 23, 2020
milvus

Technological progress is perpetually making artificial intelligence (AI) and machine-scale analytics more accessible and easier to use. The proliferation of open-source software, public datasets, and other free tools are primary forces driving this trend. By pairing two free resources, Milvus and Google Colaboratory (“Colab” for short), anyone can create powerful, flexible AI and data analytics solutions. This article provides instructions for setting up Milvus in Colab, as well as performing basic operations using the Python software development kit (SDK).

Jump to:

What is Milvus?

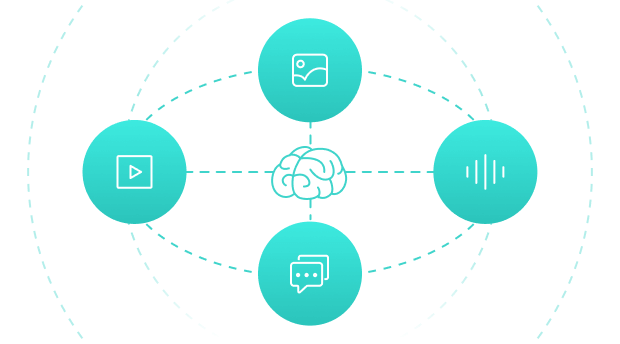
Milvus is an open-source vector similarity search engine that can integrate with widely adopted index libraries, including Faiss, NMSLIB, and Annoy. The platform also includes a comprehensive set of intuitive APIs. By pairing Milvus with artificial intelligence (AI) models, a wide variety of applications can be built including:

  • Image, video, audio, and semantic text search engines.
  • Recommendation systems and chatbots.
  • New drug development, genetic screening, and other biomedical applications.

What is Google Colaboratory?

Google Colaboratory is a product from the Google Research team that allows anyone to write and run python code from a web browser. Colab was built with machine learning and data analysis applications in mind, offers a free Jupyter notebook environment, syncs with Google Drive, and gives users access to powerful cloud computing resources (including GPUs). The platform supports many popular machine learning libraries and can be integrated with PyTorch, TensorFlow, Keras, and OpenCV.

Getting started with Milvus in Google Colaboratory

Although Milvus recommends using Docker to install and start the service, the current Google Colab cloud environment does not support Docker installation. Additionally, this tutorial aims to be as accessible as possible — and not everyone uses Docker. Install and start the system by compiling Milvus’ source code to avoid using Docker.

Download Milvus’ source code and create a new notebook in Colab

Google Colab comes with all supporting software for Milvus preinstalled, including required compilation tools GCC, CMake, and Git and drivers CUDA and NVIDIA, simplifying the installation and setup process for Milvus. To begin, download Milvus’ source code and create a new notebook in Google Colab:

  1. Download Milvus’ source code: Milvus_tutorial.ipynb.

Wget https://raw.githubusercontent.com/milvus-io/bootcamp/0.10.0/getting_started/basics/milvus_tutorial/Milvus_tutorial.ipynb

  1. Upload Milvus’ source code to Google Colab and create a new notebook.

Blog_Set Up Milvus in Google Colaboratory for Easy ML Application Building_2.png Blog_Set Up Milvus in Google Colaboratory for Easy ML Application Building_2.png

Compile Milvus from source code

Download Milvus source code

git clone -b 0.10.3 https://github.com/milvus-io/milvus.git

Install dependencies

% cd /content/milvus/core ./ubuntu_build_deps.sh./ubuntu_build_deps.sh

Build Milvus source code

% cd /content/milvus/core
!ls
!./build.sh -t Release
# To build GPU version, add -g option, and switch the notebook settings with GPU
#((Edit -> Notebook settings -> select GPU))
# !./build.sh -t Release -g

Note: If the GPU version is correctly compiled, a “GPU resources ENABLED!” notice appears.

Launch Milvus server

Add lib/ directory to LD_LIBRARY_PATH:

% cd /content/milvus/core/milvus
! echo $LD_LIBRARY_PATH
import os
os.environ['LD_LIBRARY_PATH'] +=":/content/milvus/core/milvus/lib"
! echo $LD_LIBRARY_PATH

Start and run Milvus server in the background:

% cd scripts
! ls
! nohup ./start_server.sh &

Show Milvus server status:

! ls
! cat nohup.out

Note: If the Milvus server is launched successfully, the following prompt appears:

Blog_Set Up Milvus in Google Colaboratory for Easy ML Application Building_3.png Blog_Set Up Milvus in Google Colaboratory for Easy ML Application Building_3.png

Run basic Milvus operations in Google Colab with Python

After successfully launching in Google Colab, Milvus can provide a variety of API interfaces for Python, Java, Go, Restful, and C++. Below are instructions for using the Python interface to perform basic Milvus operations in Colab.

Install pymilvus:

! pip install pymilvus==0.2.14

Connect to the server:

# Connect to Milvus Server
milvus = Milvus(_HOST, _PORT)


# Return the status of the Milvus server.
server_status = milvus.server_status(timeout=10)

Create a collection/partition/index:

# Information needed to create a collection
param={'collection_name':collection_name, 'dimension': _DIM, 'index_file_size': _INDEX_FILE_SIZE, 'metric_type': MetricType.L2}

# Create a collection.
milvus.create_collection(param, timeout=10)

# Create a partition for a collection.
milvus.create_partition(collection_name=collection_name, partition_tag=partition_tag, timeout=10)
ivf_param = {'nlist': 16384}

# Create index for a collection.
milvus.create_index(collection_name=collection_name, index_type=IndexType.IVF_FLAT, params=ivf_param)

Insert and flush:

# Insert vectors to a collection.
milvus.insert(collection_name=collection_name, records=vectors, ids=ids)

# Flush vector data in one collection or multiple collections to disk.
milvus.flush(collection_name_array=[collection_name], timeout=None)
# Load a collection for caching.
milvus.load_collection(collection_name=collection_name, timeout=None)

# Search vectors in a collection.
search_param = { "nprobe": 16 }
milvus.search(collection_name=collection_name,query_records=[vectors[0]],partition_tags=None,top_k=10,params=search_param)

Get collection/index information:

# Return information of a collection.    milvus.get_collection_info(collection_name=collection_name, timeout=10)

# Show index information of a collection.    milvus.get_index_info(collection_name=collection_name, timeout=10)

Get vectors by ID:

# List the ids in segment
# you can get the segment_name list by get_collection_stats() function.
milvus.list_id_in_segment(collection_name =collection_name, segment_name='1600328539015368000', timeout=None)

# Return raw vectors according to ids, and you can get the ids list by list_id_in_segment() function.
milvus.get_entity_by_id(collection_name=collection_name, ids=[0], timeout=None)

Get/set parameters:

# Get Milvus configurations.    milvus.get_config(parent_key='cache', child_key='cache_size')

# Set Milvus configurations.    milvus.set_config(parent_key='cache', child_key='cache_size', value='5G')

Delete index/vectors/partition/collection:

# Remove an index.    milvus.drop_index(collection_name=collection_name, timeout=None)

# Delete vectors in a collection by vector ID.
# id_array (list[int]) -- list of vector id    milvus.delete_entity_by_id(collection_name=collection_name, id_array=[0], timeout=None)

# Delete a partition in a collection.    milvus.drop_partition(collection_name=collection_name, partition_tag=partition_tag, timeout=None)

# Delete a collection by name.    milvus.drop_collection(collection_name=collection_name, timeout=10)


Milvus and Google Colaboratory work beautifully together

Google Colaboratory is a free and intuitive cloud service that greatly simplifies compiling Milvus from source code and running basic Python operations. Both resources are available for anyone to use, making AI and machine learning technology more accessible to everyone. For more information about Milvus, check out the following resources:

  • For additional tutorials covering a wide variety of applications, visit Milvus Bootcamp.
  • For developers interested in making contributions or leveraging the system, find Milvus on GitHub.
  • For more information about the company that launched Milvus, visit Zilliz.com.

    Try Managed Milvus for Free

    Zilliz Cloud is hassle-free, powered by Milvus and 10x faster.

    Get Started

    Like the article? Spread the word

    Keep Reading